When using tools like the Fill tool or the Brush tool, PaintShop Pro users can access solid colors, gradients or patterns. Although many gradients are readily available, sometimes, a user will want to create a gradient from scratch to suit their own project. Let’s see how you can do it.
Foreground/Background
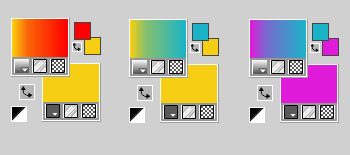
One great tool available is the Foreground-Background gradient. It will use the two colors in the tiny squares in the Materials palette here:
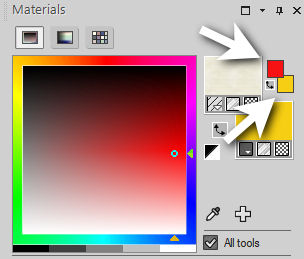
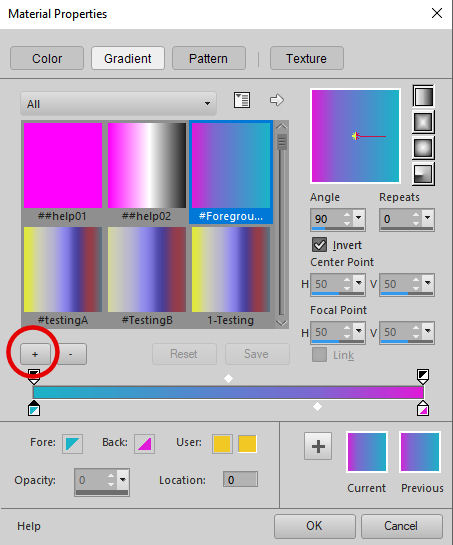
Then, in the Materials palette, click on the larger swatch for the foreground (on top) or the background (on the bottom) to open the Materials properties dialog window. Under the Gradient tab, you will be able to scroll and find a gradient that will display the two colors you had in the small swatches.
If you don’t have the Foreground-Background gradient, you can download it HERE. Save that in your Gradients folder and it will always be available. It will always use the two colors in the small swatches so you won’t have to create them from scratch. Any change in the swatches’ colors will be reflected immediately in the gradient.
So if you need a gradient using only two colors, this is the simplest and quickest method.
Creating gradient from scratch
If you want to create gradients that will include more than two colors, you can do so by following these steps.
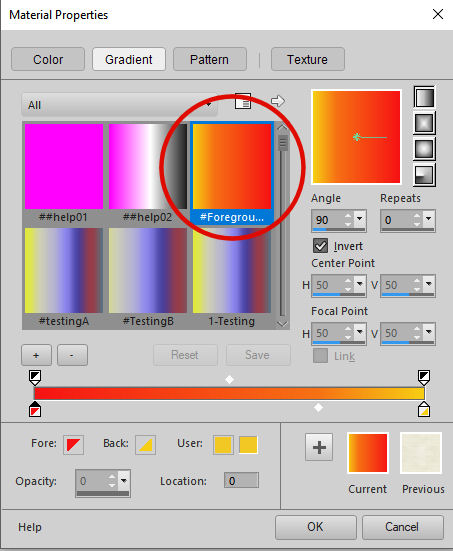
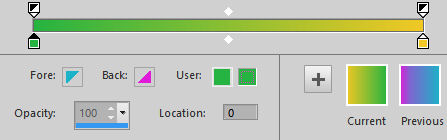
Click on the button with the + sign to create a new gradient.
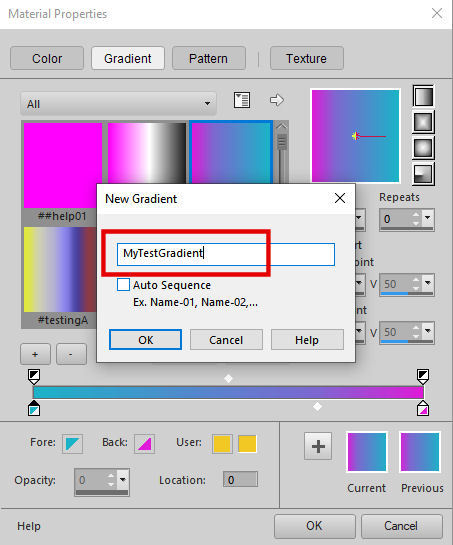
This will trigger a dialog box prompting you to name the new gradient you will create.
Then, you will get a solid color display where the gradient will appear for you to work on.
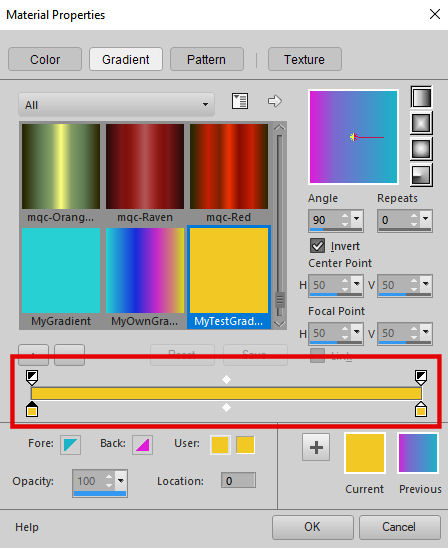
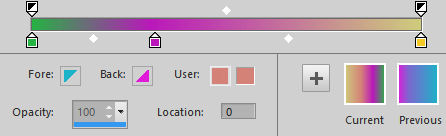
You will notice two little squares, called Color stops.
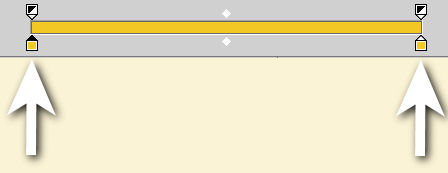
The Color stops will display the colors used in the gradient, but also their position since they can be slid left and right. Click on one of the Color stops and the specific color for that stop will appear as the “user” swatch.
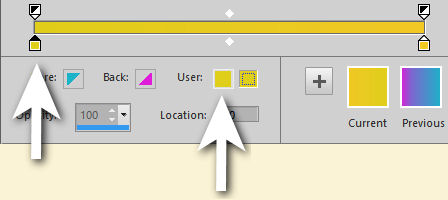
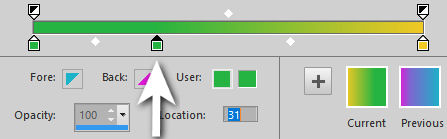
Click on the swatch to the right.
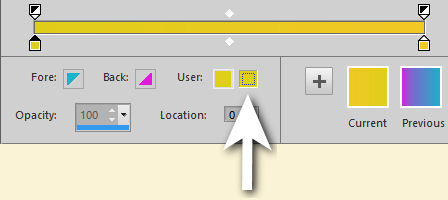
This will trigger the Materials properties dialog window to offer you the option to choose a color to be used at that location.
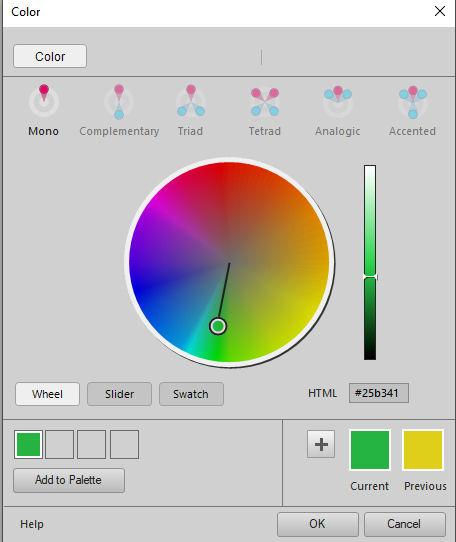
Once you accept the color in question, you will go back to the Gradient tab and that color will now be added to the gradient.
Editing the gradient further
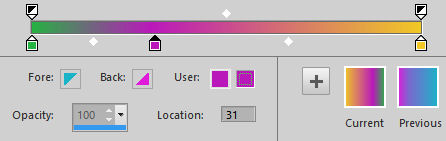
At this point, you likely want to add more colors. Hover the cursor over the gradient strip and you will see a + sign appear beside the cursor. Click just below the strip where you want that new Color stop to appear. And it will.
Repeating the previous steps, you can now change the color of that stop.
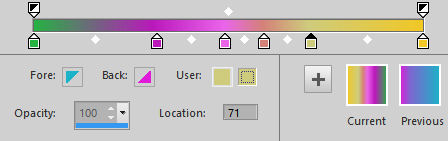
And you can add as many Color stops as you want.
If you change your mind and want to remove a Color stop, you can click on it and drag it to the far end. That will make those stops vanish. You can also hit the DELETE key while the Color stop is active.
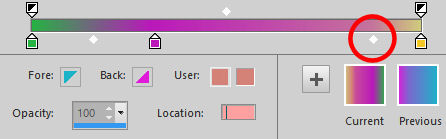
Finally, notice the white diamond between each Color stop? Those indicate where the transition between the two adjacent colors will be. By moving it toward one Color stop, you will see that one color show in a narrower or wider surface.
Once you are happy with the color combination and arrangement, click OK. Your gradient will now be saved and available in the drop-down list.
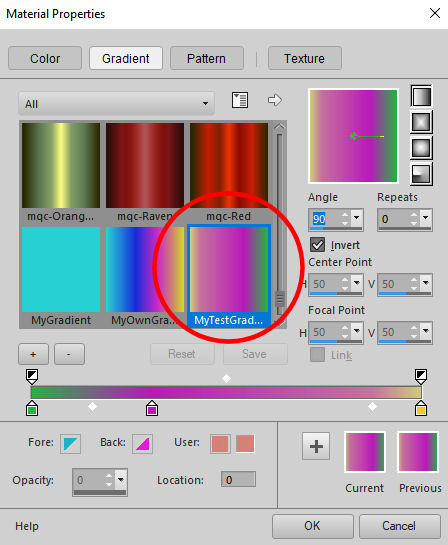
And now that you have saved this gradient, the file can even be shared with your friends.
If you find some Photoshop gradients, remember that you can also use them (most of the time). You can import them with the instructions in this article.
If you want to learn more about gradients and how you can use them creatively, you can check out the class Great Gradients.