PaintShop Pro allows you to add text along a specific path, to create various effects. The path could be a simple circle, but it could also be the contour of an element. Although you can achieve this very easily, there are a few tips that could help you make the most of this feature. Let’s have a look at this process.
Create the path
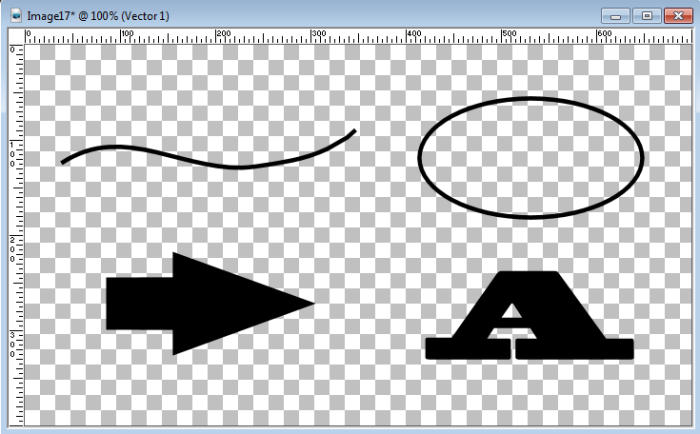
As mentioned above, you can create paths with different tools. The Pen tool will create a vector path, but so will the Ellipse tool, the Rectangle tool, the Preset Shape tool, and the Symmetric Shape tool. In addition, the Text tool itself can create a vector path, provided that you created the text as a Vector.
Add the text
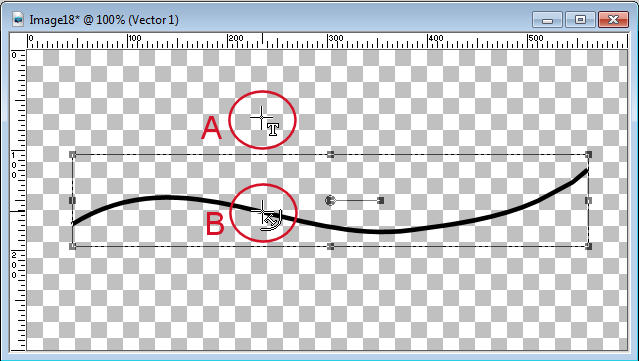
Once you have created your vector object, it is automatically considered a path for adding text. When you activate the Text tool, move your cursor close to the edge of the shape/design/path. You will see the traditional cursor will change shape: it will tilt to the left and will show a curve underneath (B) instead of a typical standing T (A).
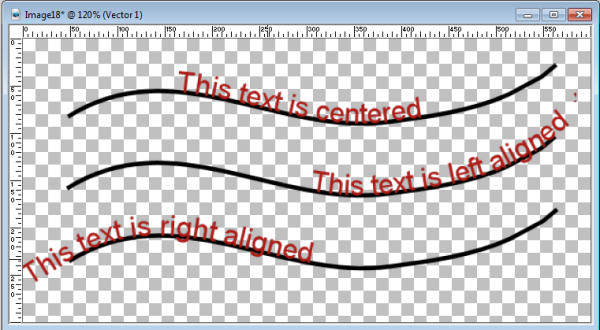
Once the cursor has changed (B), you can type your text. Depending on the alignment you have set for the text, it will either go left, right, or on both sides of the anchor point, where you will click.
When you have the look you wanted, click the checkmark to accept the text, just like you would do for any other text.
Text in reverse
By default, the path of a shape will go clockwise. In the case of an open path created with the Pen tool, it will go in the same direction that the path was created.
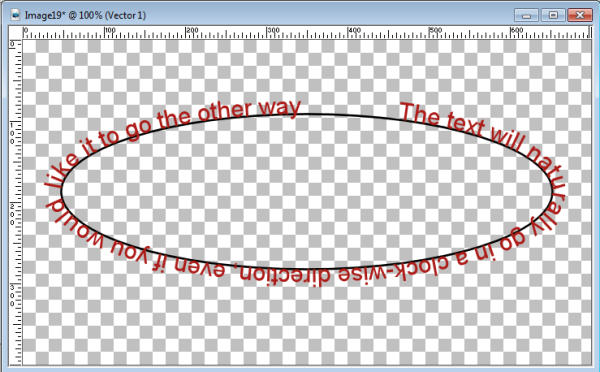
This can be sufficient in most situations, but sometimes, you may want to create text in a counter-clockwise direction. How can you do that? There is a command that will reverse the path BUT there is also a little step before you can do it. I mentioned before that your shape is already a path since you can add text to it. It is true… partly. If you want to reverse the path, you have to “remind” PaintShop Pro that this is a path. Why doesn’t it figure it out on its own? I don’t know. But that is where a lot of users get stuck.
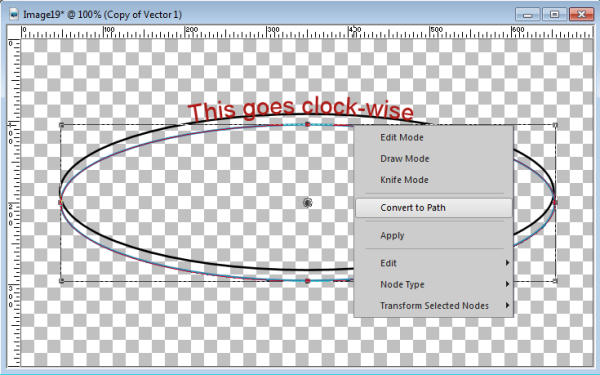
With the Pen tool active, right-click on the path (I made a duplicate, in blue) and you will see the option to Convert to Path. If you drew your “path” with the Pen tool or the Preset Shape tool, you will see that the Convert to path is greyed out. That is because they are true paths. Shapes made from the Ellipse tool, the Rectangle tool, the Symmetric Shape tool, and the Text tool will all need to be “officially” converted to a path.
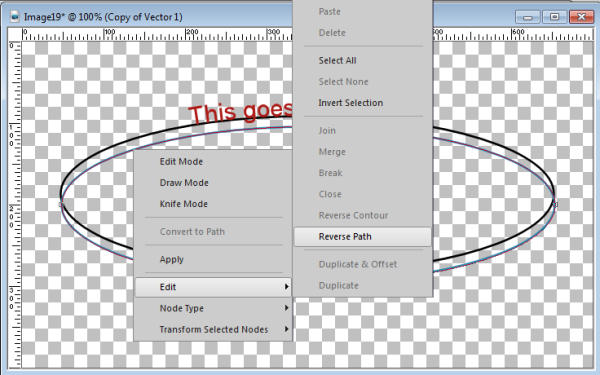
Once the path is REALLY a path, you will get the option to Edit > Reverse Path.
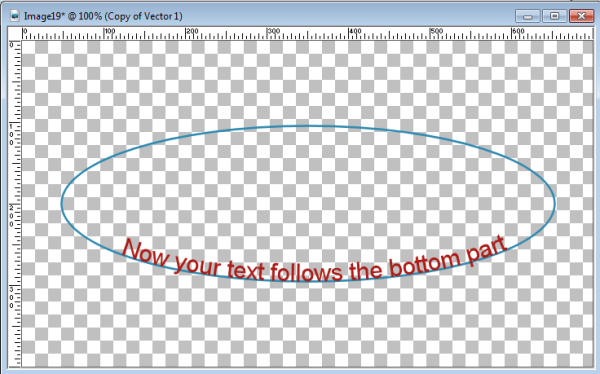
Once you have a REAL path, that is now reversed, whenever you type, the text will go in the counter-clockwise direction. Of course, that means that you will want the text on the bottom part of the ellipse, or it will become upside down when the text is on top.
Text in both directions
In order to create a text in a different direction, we need to realize that a single path can only have a single direction. A path can run either clockwise OR counter-clockwise. So in order to get text that seems to go in both directions, you need a duplicate of the path. Then you can reverse the path on one copy. Duplicate your shape instead of re-drawing it to be sure it will be identical.
In this example, I duplicated the path and changed one to blue (for better visibility).
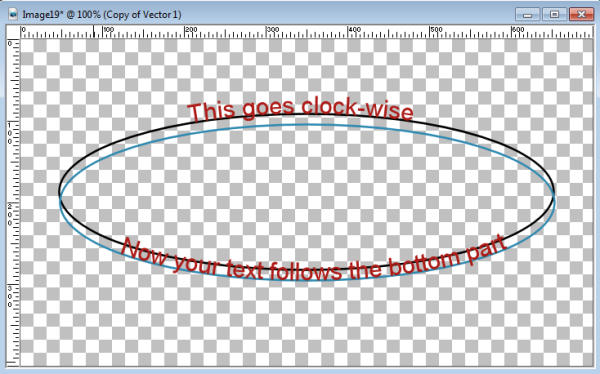
Although you will want both paths to be exactly in the same place, this shows the difference.
Remove the path
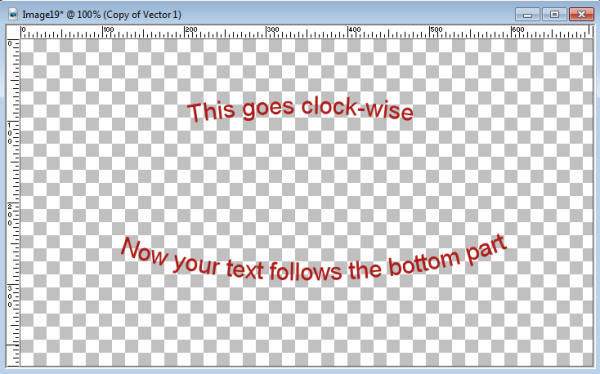
Of course, when you want to add text on a path, you don’t really want the path to stay. It is often unwanted, and you really care about the text itself. How do you remove the path? NOT by deleting it. If you delete the path, your text will become straight, as if you typed it directly onto your work. You have to hide the path object to leave the text visible alone.
More than text
What is fun with this feature is that any “font” will work like any text. This means that you can also use dingbat fonts. Here is an example of a mat done using the Edge font. In this case, I didn’t remove the path as I used it to fill in the area.
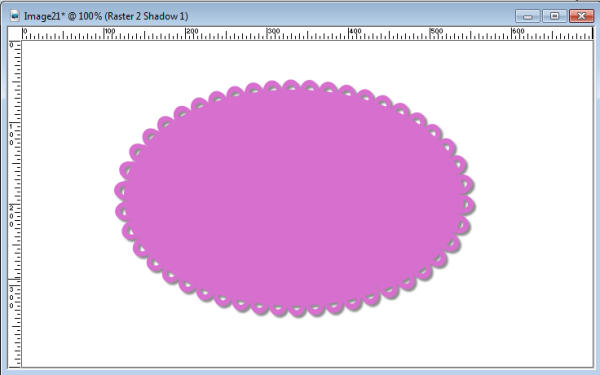
Other fonts could replicate machine stitching, and follow the path that you draw. With a few additional bevel settings, this element will look like it was stitched by you. This element used the Decorative Stitching font.

You can add text to create a frame around a focal point of your project or even on a photo. If you want to add journaling, you can place it around the edge of a full page or around a specific photo. You may also draw a path along the contour of an object on your photo (whether the element is extracted or not) and add some stories.
Or you can use some decorative fonts and create completely new elements for your project.
So what will you do now?