PaintShop Pro can help you “swap heads” if you have multiple pictures of the same group or individual. This is helpful if someone is making a funny face, has their eyes closed, or is in an odd position.
Prepare ahead
Of course, you don’t know that the photo you take will be sprinkled with funny faces, but just to put all the chances on your side, it would be a good idea to take several photos at the same time, from the same place, the same distance and with the same lighting. It is not impossible to use a totally separate photo, but it makes for more work. Of course, you might have photos already taken that you would want to improve. In that case, you won’t have any choice other than to use other existing photos, with various adjustments to make.
Swap heads
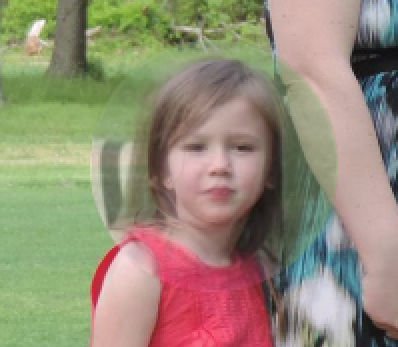
In this tutorial, I will be using three photos from Lisa, who had asked me to improve her favorite picture that was “bombed” with the girls making a pouting faces. Lucky for her, she also had other pictures of the girls on the same day, so I could use those.
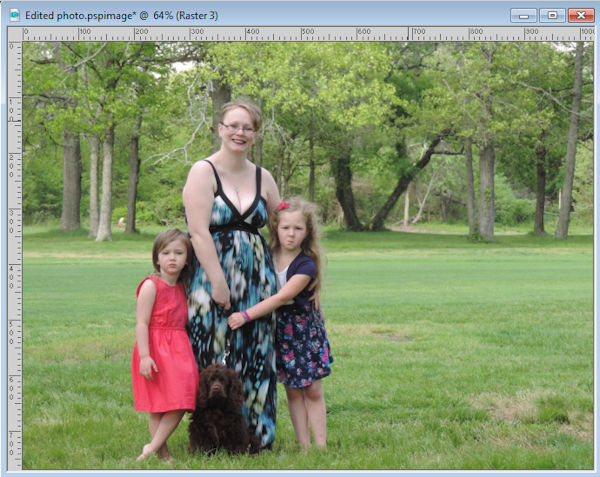
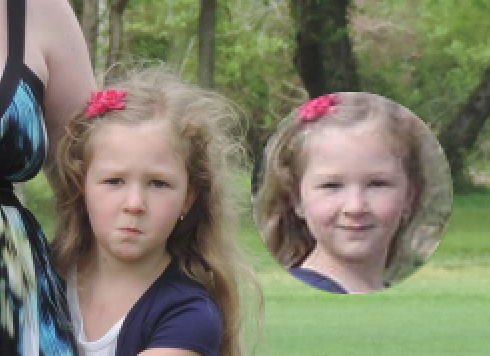
Here is the starting photo:
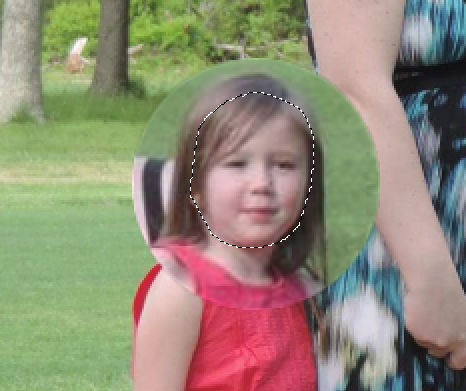
Choose another head
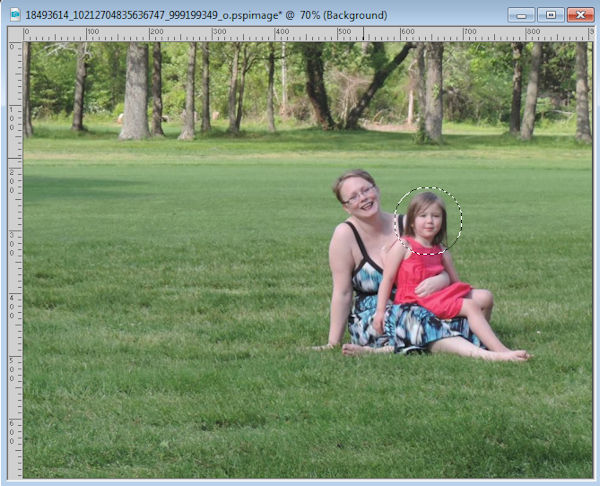
Here is one of the pictures we’ll be using to swap the pouting face with a more natural face. First, select the head with the Selection tool of your choice. I picked the Circle but I could have used the Freehand Selection tool too.
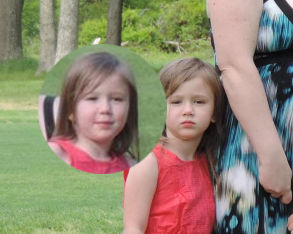
Copy and paste that new head on your original image (but you are working on a duplicate of the original, right?). Placing the new head beside the one to replace will let you make sure it is of a good size. If the two pictures were taken at a similar distance, or with the same zoom setting, the heads should be similar in size.
Adjust the new head
Overlap the new head on the old one, and reduce the transparency. This will allow you to adjust the size by aligning some obvious features, like the eyes, in this example. If needed, you can also tweak the size using the Pick tool set to Scale mode. You can enlarge the image slightly but beware that you can also lose a lot of sharpness if you enlarge too much.
With the Freehand Selection tool, select the actual face, along with some hair that will allow you to blend into the original image.
Invert the selection with Ctrl-Shift-i and delete that excess. By reducing the opacity, you can tweak the placement even more so there is some consistency with other features, like the hair, the ears, or the neck. Depending if the face is looking in the exact same direction, you might then need to move the new face slightly to the left or the right. It will be up to you to determine where to place that new and improved face.
Blend it in
Activate the Eraser tool with settings similar to these. The Hardness and the Opacity are quite low in order to allow a smoother blending around the edges of the new face.
![]()
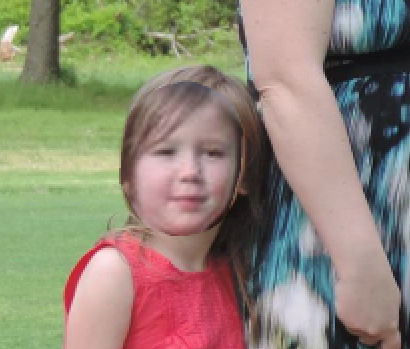
Erase all around the face until the new image seems to be part of the other one. Doesn’t that look much better?
Let’s do the same for the other little girl and swap that pouting face with a smiling one.
And here is the new image with a pretty smile.

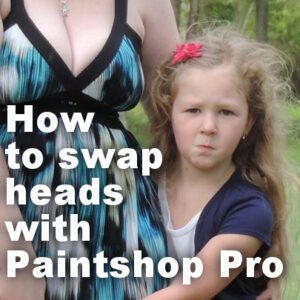
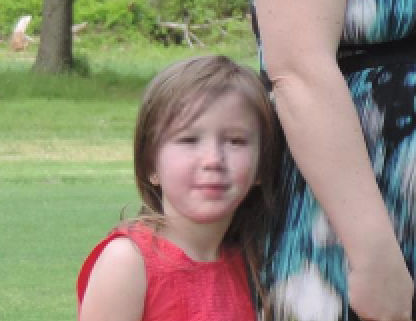
Finally, here is the end result of the head swapping process:

What do you think?
Do you also have some photos that could be improved by swapping heads? Show us what you do.
If you want to learn more about improving photos with PaintShop Pro, check out the Master Class Photo Fixes for Beginners.