When drawing with a pen and paper, we always have access to a straight edge or a ruler to create those straight lines, or to align elements together. In a digital world, those tangible rulers are not there, or are they?
Rulers
Why would you need to use rulers in a digital project? Just as for a tangible plastic ruler, this feature, in PaintShop Pro allows you to measure images and elements. Seeing the ruler on top, or on the side, allows you to see that this canvas is 400 pixels wide, and 400 pixels high.
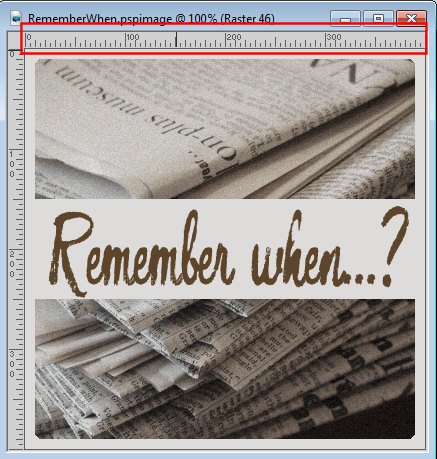
The ruler also allows me to calculate the height of the title, which goes from 150 to 250 pixels. Depending on how close you are zooming in, or the overall size of the image, you might have to approximate.
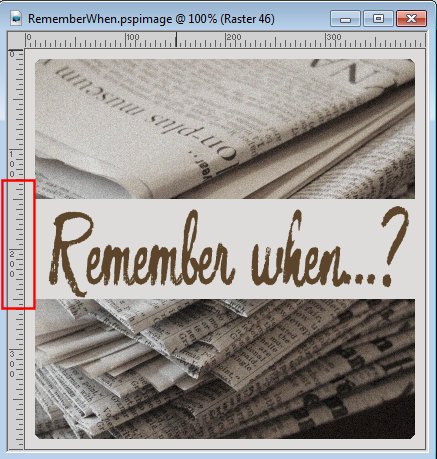
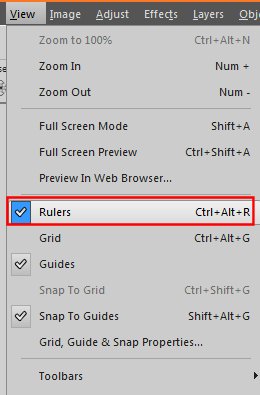
The rulers are not enabled by default when you first install your PaintShop Pro and use it for the first time. You have to enable them.
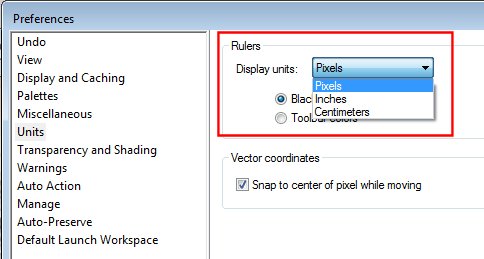
Just like plastic or wooden rulers, you have the option to display it with various units. In the illustrations above, the ruler uses pixels for a unit, but I can also have it in inches or in cm. Pixels is the default unit, but if you want to change that, you can go to File > Preferences > General program. Under the Units tab, you will get this drop-down list to change the unit to what you prefer.
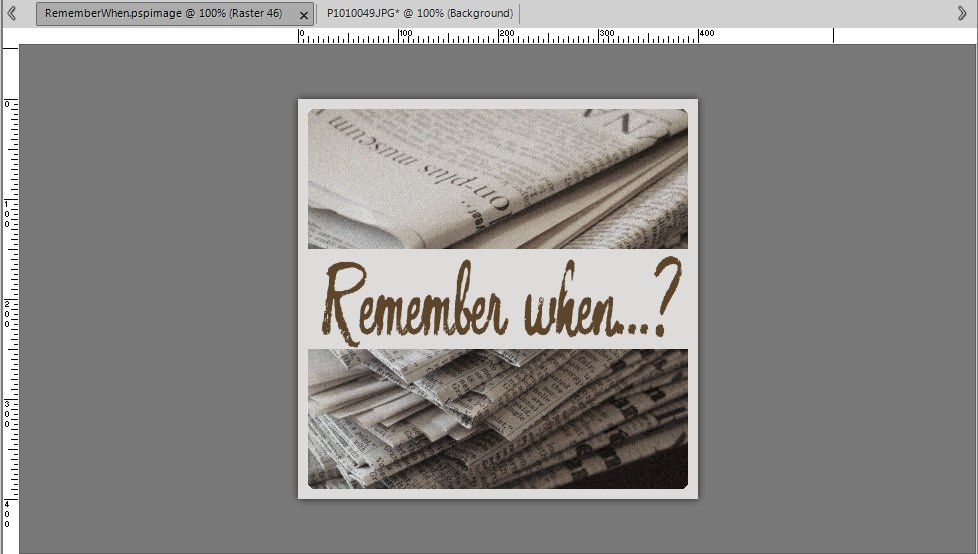
If you prefer to work with your images in tabbed windows mode, you will still see the rulers. You can still use them in the same way, but they will be somewhat further from your image, especially if it does not fill the workspace.
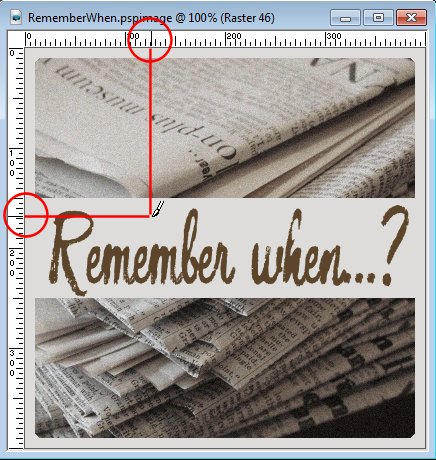
In addition to the ability to measure the image or various elements included in the image, the ruler also allows you to see where your cursor is. This can be useful with several tools. You can see the placement of the cursor as a small line visible on the ruler itself.
Guides
While using a tangible plastic ruler, you can use it to draw a straight line. In PaintShop Pro, the ruler can’t do it, but we have the Guides to help. The guides reside inside the rulers. I guess it makes sense as it is as if we used the ruler directly on the project. You can “pull the guides” from the ruler with your cursor. Click on the ruler, hold, and pull from the ruler. You can pull a single guide or repeat the process and pull many. You can have horizontal or vertical guides or a combination of both.
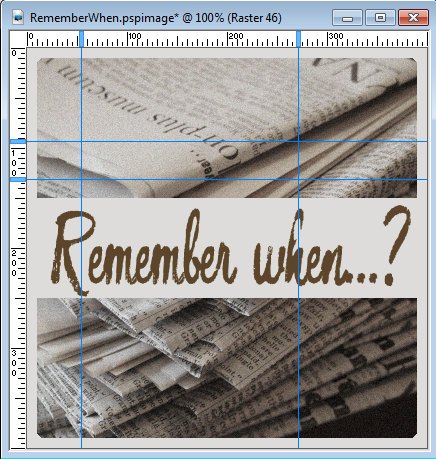
However, by default, they are not enabled, and if that is the case, you can try to grab them from the rulers and nothing will happen. Make sure you enable them.

The guides can help you align elements together, or give you a visual representation of spacing (like the rule of thirds). But the guides also have the ability to snap on (if you enable that function, which is NOT necessary all the time). Again, this is not a function that is enabled by default, so you will need to check it manually first.
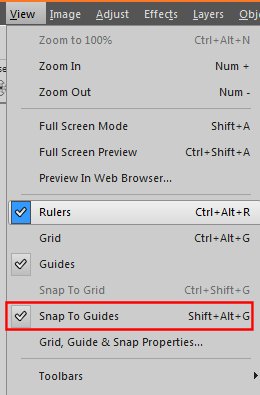
When you enable the “Snap to guide” function, elements that you place close to the guides will snap to them as with magnets. An element can snap on top (blue), on the bottom (red), on the sides (green), or in the middle (yellow and purple). This allows you to have perfect alignment/placement of elements on your project.
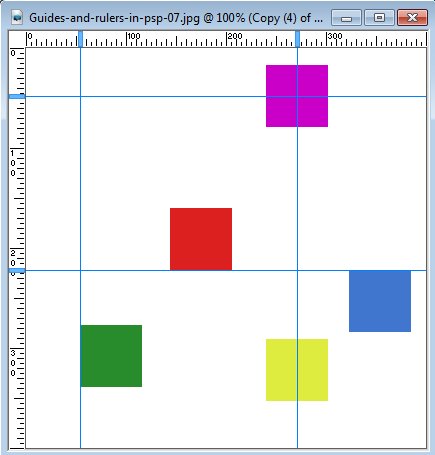
If you want to move guides to a different location, you can always grab them inside the ruler, where you can see a little rectangle (blue in these examples), and move them further. If you want to be very precise, you can also right-click on that rectangle. You will see a window appear where you can enter the exact location you want that particular guide to be. Sometimes, a couple of pixels can make a huge difference in a project.
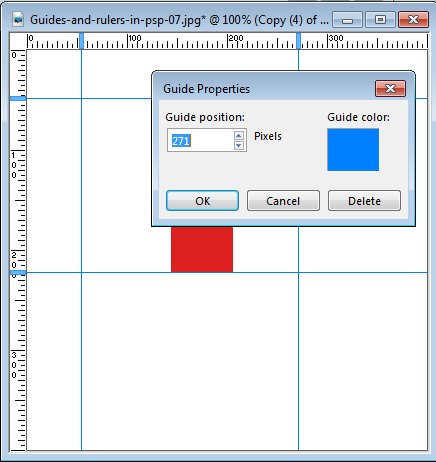
And as an added bonus, if you are working with many guides and you want one of them to stand out, you can also change its color with the same window.
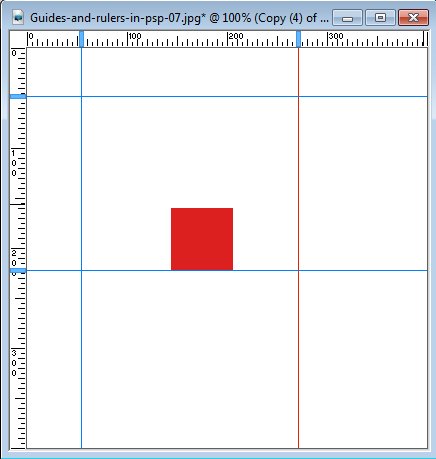
Snapping on the guides is not only for positioning elements but it can also be used to make perfect selections or adjust the size perfectly to have some consistency. For example, resizing various photos to the same height, no matter their width is easy using the guides.
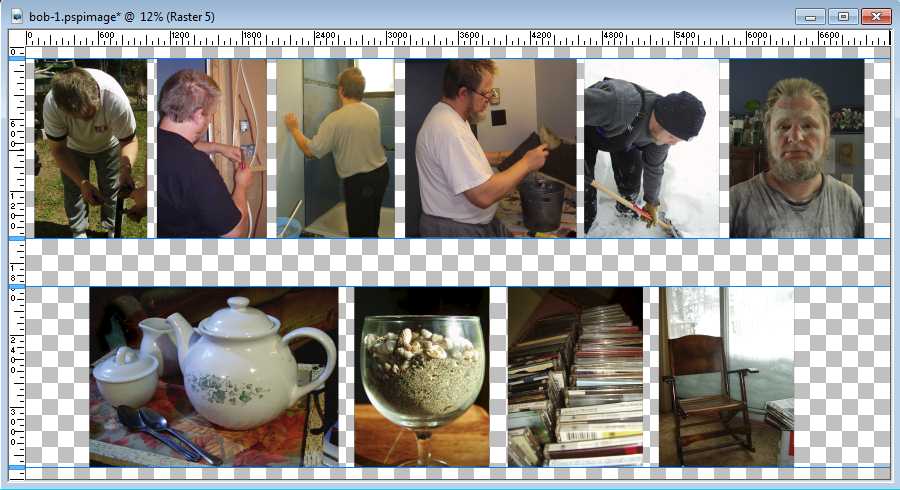
As you can see, rulers and guides are hiding some powerful uses that will help you be more precise and accurate in your graphic projects, and even save you some time too. What are you using the rulers and guides for?

